- Способы обшивки бани вагонкой
- Способ №1 – Крепление с помощью кляймера
- Способ №2 – Косое вбивание гвоздя
- Способ №3 – Прямое вбивание гвоздя в шип
- Способ №4 – Сквозной способ крепления вагонки
- Варианты расположения вагонки
- Технология отделки бани вагонкой
- Подготовительные работы
- Монтаж обрешетки
- Утепление и пароизоляция стен
- Обшивка бани вагонкой
- Статья
- Видео
Способы обшивки бани вагонкой
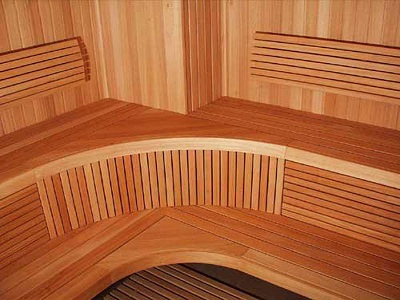
Обшивка бани вагонкой
На сегодняшний день специалисты используют четыре способа обшивки бани вагонкой. Каждый способ имеет свои достоинства и недостатки, о которых мы поговорим подробнее!
Способ №1 – Крепление с помощью кляймера
- Крепление с помощью кляймера
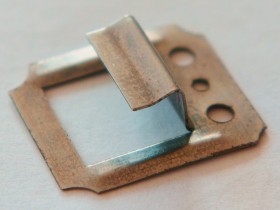
- Кляймер
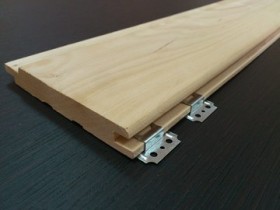
Кляймер представляет собой специальный металлический зажим, который одевается на вагонку и фиксируется к стене, тем самым надежно закрепляя отделочный материал. Крепление вагонки с помощью кляймера является наиболее популярным и простым, к тому же процесс монтажа вагонки в данном случае занимает совсем немного времени. Одним из главных достоинств данного способа крепления вагонки является простота демонтажа поврежденной доски.
Единственное требование, предъявляемое к кляймеру – скоба должна быть оцинкованной, т.к. парилка имеет повышенную влажность и обычные металлические кляймеры быстро поржавеют. Исходя из этого, специалисты рекомендуют выбирать не только кляймеры оцинкованные, но и остальные крепежные материалы: гвозди, саморезы и т.д.
Процесс крепления вагонки с помощью кляймера выглядит следующим образом: кляймер одевается на пиломатериал, прижимается к обрешетке и фиксируется заподлицо в брус саморезом. После этого подбирается новая доска и процесс повторяется.
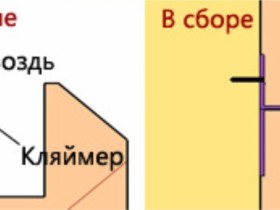
Способ №2 – Косое вбивание гвоздя
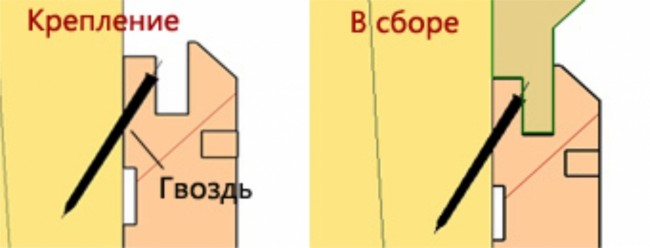
Косое вбивание гвоздя
Данный способ не рекомендуется применять при отделке бани вагонкой, т.к. доска может легко расколоться, причем по всей комнате таких браков будет несколько, в зависимости от того, насколько качественный пиломатериал и насколько хорошо вы владеете навыками работы по дереву.
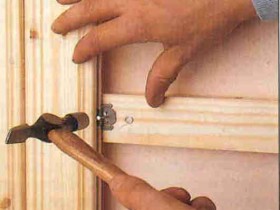
Сущность способа такова: вагонка прислоняется к обрешетке и с помощью гвоздя, который направляется накось в паз, надежно фиксируется к обрешетке. Что бы шляпка гвоздя не выступала и полностью зашла заподлицо, помимо молотка рекомендуется использовать добойник.
Обращаем ваше внимание на то, что по всей длине вагонки таких гвоздей нужно вбить не менее 6 штук (если доска длиной 2,5 метра) и вряд ли вы сможете без брака прификсировать доску к обрешетке, а малейшие трещины и сколы приведут к сокращению долговечности материала.
Несмотря на все недостатки данного способа, многие дачники активно используют именно его, надеясь на беспроблемную обшивку бани вагонкой.
Способ №3 – Прямое вбивание гвоздя в шип
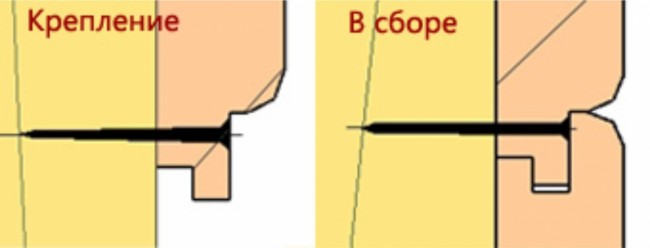
Прямое вбивание гвоздя в шип
Данный способ так же не рекомендуется использовать из-за того, что вбивание гвоздя может спровоцировать появление трещин и сколов. Прямое вбивание гвоздя в шип является более безопасным способом отделки бани вагонкой своими руками. Следует отметить, что не любой вид вагонки подойдет по своим характеристикам для данного способа крепления. Необходимо что бы шип был глубоким и толстым, поэтому прямое вбивание гвоздя в шип рекомендуется использовать в том случае, если у вас профиль вагонки это «Евровагонка» либо «Софт-лайн».
Процесс крепления имеет следующий вид: вагонка прижимается к обрешетке и крепится оцинкованным гвоздем заподлицо. Что бы шляпка не выступала с доски ее так же рекомендуется углубить с помощью добойника.
Способ №4 – Сквозной способ крепления вагонки
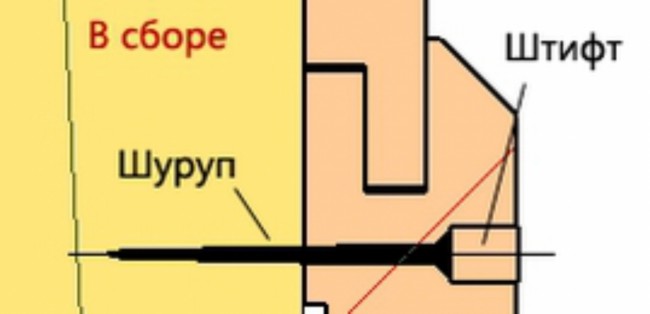
Сквозной способ крепления вагонки
Сквозной способ крепления вагонки используют для отделки полок в бане. Специалисты рекомендуют избегать данного способа крепления вагонки, т.к. несмотря на надежность соединения, остается отверстие в доске, которое неблагоприятно влияет на интерьер бани. Данные отверстия пытаются скрыть деревянным штифтом, но это не спасает, т.к. с течением времени пробка усыхает, и отверстия снова появляются.
Что бы закрепить вагонку к обрешетке, необходимо прислонить ее к рейке, засверлить отверстие под саморез (глубина отверстия должна составлять половину длины самореза), после чего шуруп до упора вкрутить в рейку.
Варианты расположения вагонки
Помимо способов крепления вагонки существует еще одна важная деталь – варианты расположения вагонки. Чаще всего доски фиксируют к обрешетке горизонтально, вертикально и диагонально. В каждом случае обрешетка должна устанавливаться перпендикулярно расположению доски. К примеру, если вагонка будет нашиваться горизонтально, обрешетку необходимо монтировать вертикально.
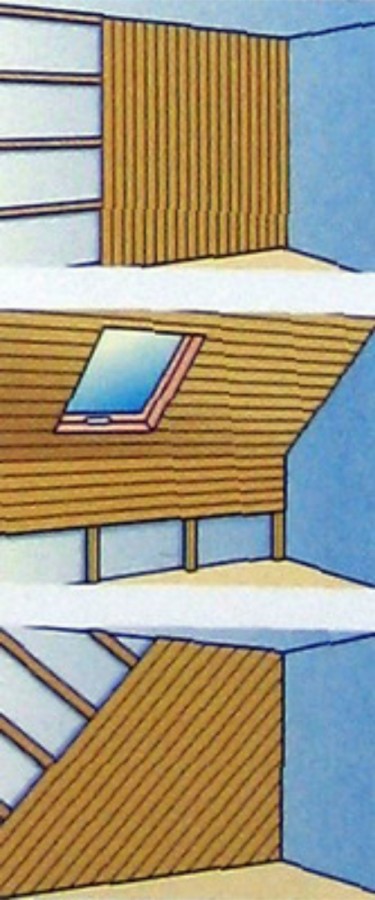
Варианты расположения вагонки
Специалисты рекомендуют использовать комбинацию расположений вагонки, что бы придать интерьеру бани более необычный вид.
О том, как вагонка может располагаться и крепиться мы поговорили, теперь перейдем к самой технологии отделки бани вагонкой.
Технология отделки бани вагонкой
Как мы уже говорили, технология отделки бани вагонкой не представляет ничего сложного. Все что нужно это подготовить стены к обшивке, набить каркас, утеплить стены и зашить вагонкой. Подробно рассмотрим каждый из этапов.
Подготовительные работы
Во время подготовительных работ необходимо подбить смету на материалы, купить все необходимые отделочные и крепежные материалы и провести коммуникации по стене.
Что касается последнего, поговорим об этом немного подробнее. Каждое помещение бани имеет осветительные приборы. Хотя некоторые специалисты рекомендуют создавать открытую электропроводку в бане, многим дачникам по душе скрытная электропроводка, которая не ухудшает внешний вид помещения. Именно поэтому все провода, а так же трубы водоснабжения (если такие имеются) необходимо спрятать за обшивкой, заблаговременно прификсировав их к стене.
Так же во время подготовительных работ рекомендуется выровнять стены, если существуют явные неровности (выбоины, трещины, горбы).
Ну и последнее мероприятие на данном этапе – поместить закупленную вагонку в помещение бани. На протяжении 1-2 дней вагонка должна полежать в помещении, что бы привыкнуть к микроклимату бани.
Монтаж обрешетки
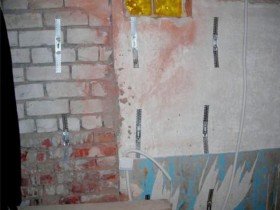
Как только стены будут выровнены, а все коммуникации прификсированы к стене, переходим к монтажу обрешетки. Для этого рекомендуется использовать брус, сечением 50*20 мм и металлические подвески, которые принято называть «пэшками». Первым делом размечаем места крепления подвесок к стене. Обрешетка должна фиксироваться строго вертикально (либо горизонтально), поэтому при ее установке необходимо пользоваться строительным уровнем и отвесом. Шаг установки подвесов не должен превышать 40 см, иначе конструкция будет не достаточно прочной. Подвесы фиксируем к стене с помощью дюбелей, а брус к подвесам саморезами.
Обращаем ваше внимание на то, что бруски обрешетки необходимо заблаговременно вскрыть антисептическими средствами, которые предотвратят гниение материала.
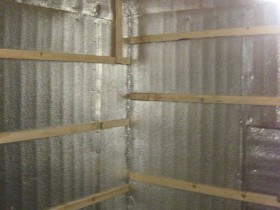
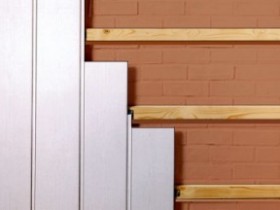
Более подробно ознакомиться с процессом и схемой обрешетки вы можете на следующих фото-примерах:
- Монтаж подвесок
- Готовая оберешетка
- Горизонтальная обрешетка
- Монтаж вагонки на обрешетку
Утепление и пароизоляция стен
Перед тем как крепить вагонку к обрешетке, нужно выполнить еще одно, очень важное для бани мероприятие – паро- и теплоизоляцию комнаты. Мы уже говорили о том, как правильно осуществить утепление и гидроизоляцию бани своими руками, так что можете ознакомиться с данными статьями, где подробно рассмотрены данные мероприятия.
Что бы вы кратко представили весь процесс, рассмотрим наиболее важные нюансы.
Для утепления бани рекомендуется использовать базальтовую вату: она не горит, долговечна и имеет хорошие теплоизоляционные свойства. Материал укладывается между брусками обрешетки и фиксируется пароизоляционным материалом.
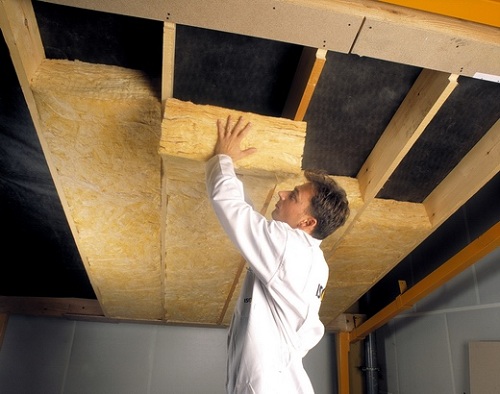
Утепление бани базальтовой ватой
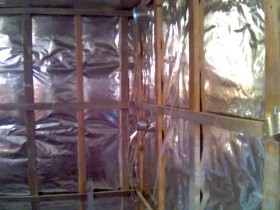
Для пароизоляции стен в бане рекомендуется использовать фольгированный материал. Он имеет хорошие гидроизоляционные свойства и легко крепится к обрешетке с помощью строительного степплера. Стыки фольги изолируются специальным строительным скотчем и все, пароизоляция бани готова!
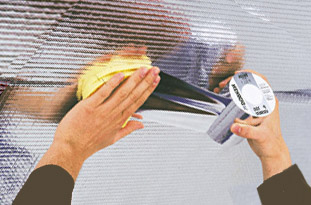
Пароизоляция бани фольгой
Обшивка бани вагонкой
Ну вот мы и подошли к самому основному процессу – обшивке бани вагонкой. Утепленные и тщательное заизолированные стены готовы к том, что бы их обшили декоративными досками. ВЫ уже знаете способы крепления вагонки к обрешетке, а так же варианты расположения досок. Теперь по своему вкусу крепим доски к брускам и можем наслаждаться отдыхом в бане!
Обращаем ваше внимание на то, что доски должны вплотную подбиваться друг к другу, что бы не было стыков и зазоров, иначе тепло будет быстро уходить с парилки, а сам интерьер комнаты будет желать лучшего!
Рекомендуется после отделки бани вагонкой нанести на доски воск либо другой масляный состав, который защитит материал от влаги и придаст ему более декоративный вид (отблеск).
Вот и все, что мы хотели рассказать вам о том, как правильно осуществить обшив бани вагонкой! Более подробно вы можете ознакомиться с данным мероприятием на этом видео уроке:
Рекомендуем так же ознакомиться со статьей: конопатка сруба своими руками!

