- Оригинальная альтернатива топиару
- Материалы и инструменты для создания скульптуры
- Создание садовой скульптуры
- Шаг 1 — Выбираем форму скульптуры
- Шаг 2 — Создаем конструкцию
- Шаг 3 — Подготавливаем тело скульптуры
- Шаг 4 — Укрепляем скульптуру сеткой
- Шаг 5 — Засыпаем грунт в каркас
- Шаг 6 — Посев семян
- Шаг 7 — Уход за скульптурой
Оригинальная альтернатива топиару
Топиар представляет собой искусство стрижки декоративных кустов и деревьев для придания им необычных форм, которые украшают ландшафтный дизайн участка. Весомый недостаток топиара заключается в том, что за растениями необходимо тщательно следить, а сама стрижка по плечу только опытному специалисту, работа которого стоит далеко не дешево.

Топиари
Так же следует отметить, что для создания красивой топиарной формы потребуется не менее 3-5 лет, что часто является главной причиной поиска альтернативы.
Что бы ваш сад был украшен скульптурами из растений можно обойтись и без топиара, использовав специальную формочку, обросшую газонной травой либо низкорослыми цветами.

Зеленая скульптура из сетки и газона
Сейчас мы рассмотрим, как сделать озелененную скульптуру в саду своими руками!
Материалы и инструменты для создания скульптуры
Для того, что бы сделать садовую скульптуру своими руками, вам понадобятся следующие материалы:
-
Стальная проволока, толщиной более 8 мм
-
Материал для скрепления проволоки (сварка либо вязальная проволока)
-
Полипропиленовая либо стальная сетка (можно использовать меньшее сечение)
-
Солома
-
Плодородная почва
-
Специальная питательная смесь для высадки газонной травы
-
Семена низкорослых растений либо газонной травы
Из инструментов нам понадобится лейка с водой, мастерок и сварочный аппарат (если будет использовать сварка проволоки).
Как только все материалы и инструменты будут подготовлены, можно сразу же переходить к созданию садовой скульптуры.
Создание садовой скульптуры
Процесс создания скульптуры из растений не сложный, но займет у вас определенное время. Что бы информация легко воспринималась, предоставим всю технологию в виде пошаговой инструкции.
Шаг 1 — Выбираем форму скульптуры
Для начала необходимо определиться с формой садовой скульптуры. При выборе формы рекомендуем учитывать общий ландшафтный дизайн участка и садовый стиль.
На сегодняшний день наиболее популярными формами являются:
-
Правильные геометрические формы (шар, пирамида, куб)
-
Сказочные герои (к примеру, гномики)
-
Животные (львы, слоны, бегемоты, коты)
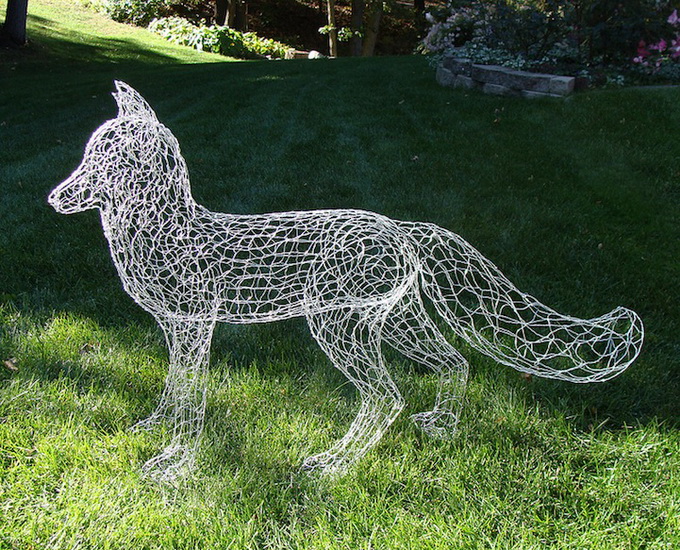
-
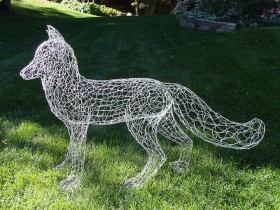
- Формочка лисицы
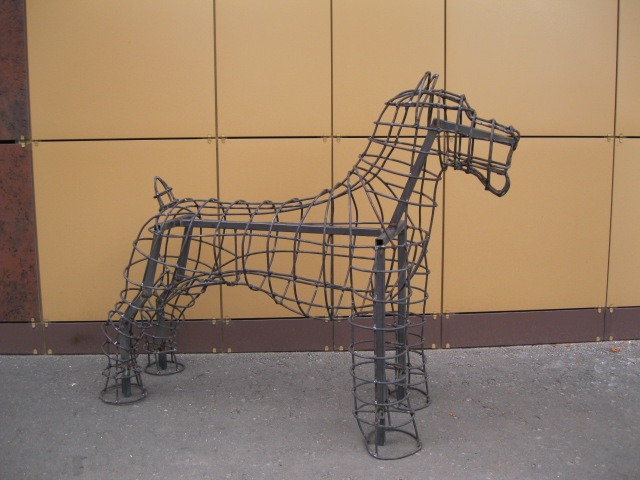
-
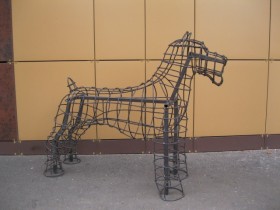
- Формочка собаки
-
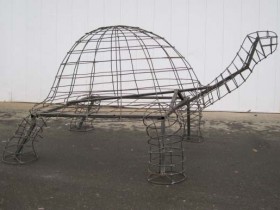
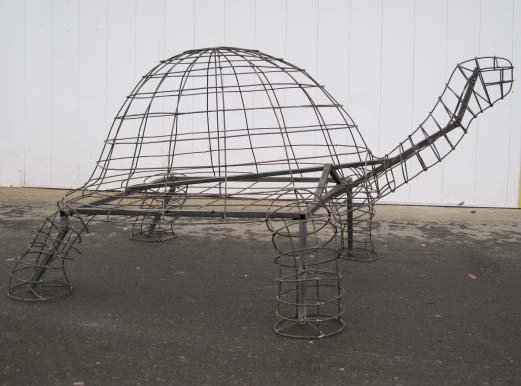
- Формочка черепахи
После того, как форма скульптуры будет выбрана, переходим к самому процессу создания.
Шаг 2 — Создаем конструкцию
Используя стальную проволоку, создаем каркас для будущей скульптуры. Рекомендуется скреплять проволоку сваркой, так конструкция будет более устойчивой и долговечной. Если по каким либо причинам сварочного аппарата не найдется, с помощью вязальной проволоки можно довольно надежно закрепить элементы конструкции.
Шаг 3 — Подготавливаем тело скульптуры
Телом скульптуры у нас будет выступать плодородный грунт, смешанный с питательной смесью. Точная пропорция смешивания элементов указывается на упаковке с питательной смесью.
Для того, что бы тело скульптуры было вязким и не рассыпалось сразу же после создания скульптуры, добавляем в смесь немного соломы, заблаговременно смочив почву водой.
Шаг 4 — Укрепляем скульптуру сеткой
Стальная сетка защитит почву от высыпания и сделает конструкцию скульптуры более устойчивой. Если ваша фигура будет установлена вертикально, тогда оберните сеткой ее нижнюю часть. В том случае, если фигура будет горизонтальной (к примеру, лежащая на земле русалка), необходимо укрепить бока скульптуры.
Шаг 5 — Засыпаем грунт в каркас
Используя смоченный грунт с соломой, аккуратно засыпаем готовую смесь в каркас из проволоки. Смесь не должна быть слишком жидкой, иначе грунт начнет просачиваться через ячейки.
Что бы убрать лишний грунт и придать скульптуре красивые формы, используйте мастерок.
Тело садовой фигуры должно быть плотно набито грунтом, пустот быть не должно, иначе после проседания почвы фигура потеряет свою форму.
Шаг 6 — Посев семян
Как только фигура из земли будет создана, переходим к завершающему этапу — посеву семян газонной травы либо низкорослых растений.
Мы рекомендуем комбинировать и цветы и газонную траву для создания оригинальной садовой скульптуры.
Что вы поняли суть комбинирования приведем такой пример: при создании фигуры льва, гриву рекомендуется создавать из цветов, а все остальное тело из газона.

Зеленый лев в саду
Шаг 7 — Уход за скульптурой
До того времени, как газонная трава и цветы покрою тело скульптуры полностью, необходимо поливать объект полностью. Обращаем ваше внимание на то, что при поливе садовой фигуры осторожность должна стоять на первом месте. Рекомендуется поливать фигуру из лейки, т. к. вода со шланга может размыть грунт из-за высокого напора.
Вот и весь процесс создания садовой фигуры из растений своими руками. Как вы видите, ничего сложного нет, главное аккуратно выполнять каждый из этапов.
Следует отметить, что дополнительную устойчивость скульптуре придаст корневая система растений, которая со временем разрастется по всему грунту!

Пример готовой садовой скульптуры из растения
Рекомендуем так же просмотреть статью: садовые скульптуры из гипса своими руками!